Monday, August 16, 2010

How I made the roof, part 3 of 3

Finishing, and the top ridge
At the top end of each ridge, make a cut across the fold at 1cm (3/8") down from the end as shown.
Now cut off the folded bit as far as the first cut, so you have removed the ridge part. Make sure that it lies flat when opened out. Repeat for each ridge.

And now the part where I don't have photos of the process - I didn't think to take them while I did the original roof! I was too busy trying to get it right to be bothered with the camera as well :)

Make sure your pieces are cut straight and square. Leave extra at the back as the sheet is hard to measure accurately with the folds making themselves known :)

Spread tacky glue onto the roof surface and spread evenly. Start laying the painted sheet from the front to the back (it may help to have a friend hold it up from the glue as you work your way across). Smooth it down along the 'valleys' (I used a soft cloth), and also push into the ridges with a ruler (not a metal one, it may chip the paint) to make sure they sit down neat and crisp.
It also helps to squeeze the ridges down at each end with a pair of tweezers as the glue dries. The ridges will try to rise up a little, and as the glue gets more tacky may need help to be pushed down.
When it's dry, trim the back edge. I left 1cm extra and folded it down onto the back of the house.
The top roof ridge.

Take your extra piece of painted card, and cut it 3cm wide along the length, and mark the centre line. Pre-fold this, then run a line of glue along the centre line. Lay a length of fine dowel along this. The dowel I used was the same diameter as toothpicks (you could use these instead, after cutting off the points).
Let the glue dry.
Glue this piece and lay on the roof with the edges meeting the folded ridge ends.
The dowel lies along the top edge. Press gently with your fingers along and around the dowel to delineate it a little. Trim the ends.
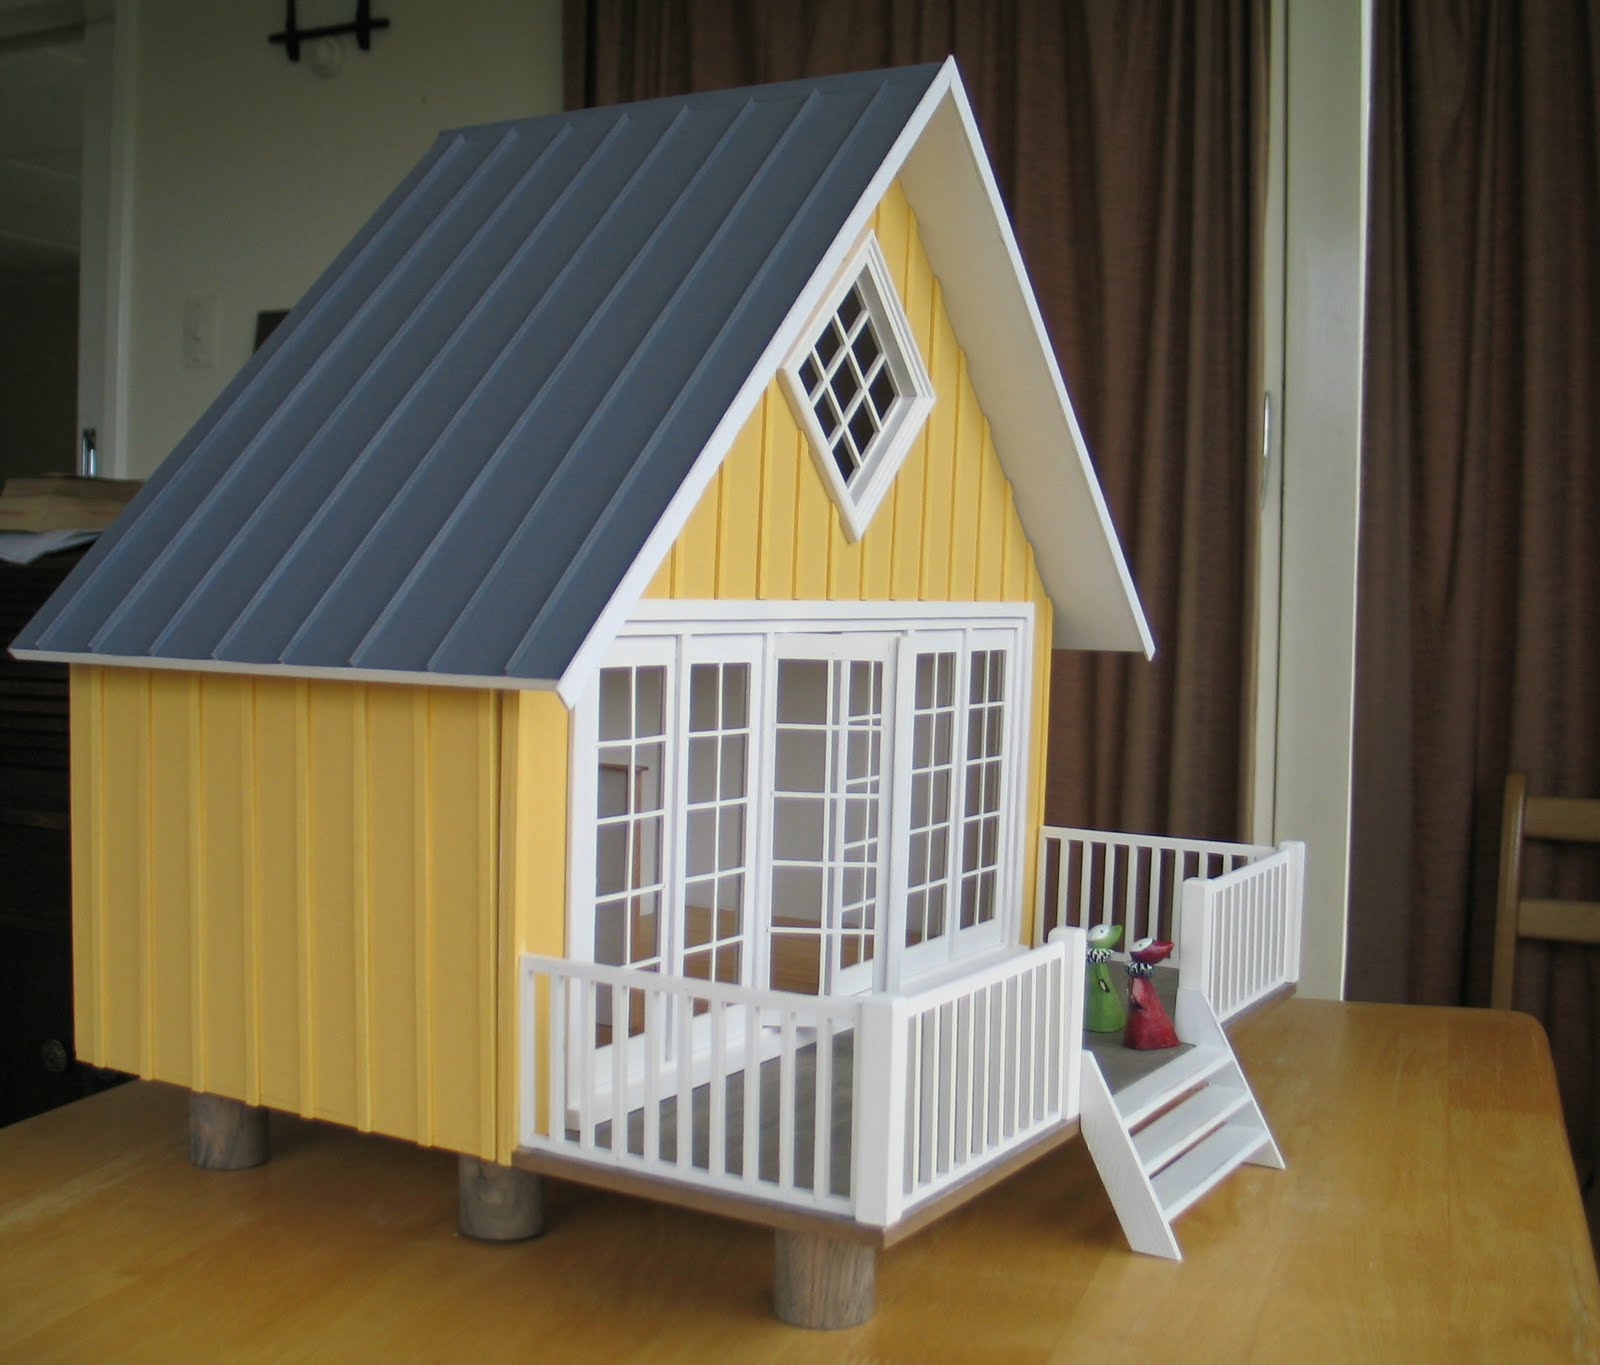
And here's your roof!

How I made the roof - part 2 of 3

Folding and gluing the ridge lines
On the side with the ruled lines, run a line of tacky glue down the foldline.
Fold it on the line, to spread the glue.
Now bring one of the outside foldlines (the ones marked at 4mm) to meet the other. When it is in place - this may take a little patience - weight it down along the line until the glue has 'taken'. This could take anywhere from 5 minutes to 30 minutes depending on temperature and dampness of the climate.
You will have a little pleat under the weights - it doesn't matter which way it sits.
This is what the sheet looks like on the painted side when dry.
Now you can fold the ridge pleats the other way, then backwards and forwards, running your finger along them, until they sit nicely upright with a flat background.

How I made the roof - part 1 of 3

Preparing and painting the card

Here is a quick tutorial on how I made the roof of the lakehouse. It was made to resemble flat metal roofing joined by ridges.
You need thin non-shiny card for this project, it can't be too thick/stiff or you won't be able to get the ridges fine enough.
You'll need to work out which way the grain runs in the card, and make the folds along the grain, not against it. This will help a lot to get the ridge lines fine.
I have done this in the photo using two square sheets of paper and joining the edges of each - one is joined with the paper in one direction, and the other in the opposite direction. You will see that one piece sits lower than the other (the piece on the left) - this has the grain along the foldline and shows less resistance. If your ridge lines follow this foldline they will behave better.
This can usually be done simply just by holding the card or paper and trying to bring the edges together; you'll be able to feel the resistance in your hands.
For those of you who want to make mini books, use the same technique to place the folds of your pages - they will sit together more happily and won't want to fly open so much.
Measure your roof and work out the size of the card - add more to the width to allow for the folds. I find it's useful to add some extra at the back of the roof as the final measurements can vary a little due to the nature of the ridges - it can be trimmed off later.
Rule lines where the folds will go - I spaced mine at 4.5cm (1.75"), then rule more lines 4mm (5/32") from each side of the foldlines.
Score the lines with an embossing tool, then fold each line backwards and forwards to set it in place.
Mix your acrylic paint to the colour you want. I used 1 part burnt umber, 2 parts black and about 7 parts white. Remember that it will darken when dry. I also found that it looked very much darker than I thought it would - this is because of the shadows cast by the ridges.
It's a very good idea to make a small test 'roof' first to trial colour and technique and final look.
Paint the non-ruled side of the card with the paint. The acrylic paint will show paint strokes, so try to paint as straight as possible parallel to the ridges.
Roof ridge - paint another strip about 4-5 cm (1.5" - 2") wide, and longer than your roof ridge, in a similar manner.
Let it all dry thoroughly, overnight if possible, as the paint needs to harden well so it doesn't crack when folded.

Sunday, August 15, 2010

The roof is on

. . . and the house is raised up on its big posts.

I painted card with grey acrylic paint and made fine raised 'joins' to resemble metal roofing, put on some ridge flashing, then added white barge boards at the front.

BTW this makes a very inexpensive roof!!

Tuesday, August 10, 2010

Leather pouches on Etsy

LinkHi there - I've just been amusing myself making some soft leather pouches to put in my Etsy shop (here). They could be money pouches for Tudor or medieval scenes, or I thought that your witches or wizards may like to keep herbs or amulets or treasures in them. They're designed to sit on a table, and have little 'copper' or 'bone' beads to pull them closed (these are actually glass beads).
They're non-opening, sorry, so you can't peek inside! :)

Monday, August 9, 2010

Oh my!

I've been shopping and found treasure! This beautiful little lidded box painted in pokerwork style, with a touch of gold, is from Terence Stringer Miniatures (here - click on the miniatures index box). Terence makes woodwares and silverware, and Heather does the exquisite painting.

You have to see to believe - it is so finely made! It is well worth a visit to their site to see the extremely high quality minis! In woodware they have Russian nesting dolls, boxes, dummy boards, dolls, eggs, acorns (I love the one with the sleeping fairy), little buildings with tiny people, and more. As for the silver - wow! Lots!! And all amazing. I love the pens!!
They also have Deco figurines and paintings.

Sunday, August 8, 2010

Lakehouse stairs


I've installed the little dividing wall and the spiral stairs in the downstairs part of the lakehouse.
Here it is so far, with a few items of furniture to show the general setting.
I've decided not to use the white incised boards for the attic ceiling - they made it look even smaller and somewhat cramped.

Downstairs is the modern part, and upstairs has some older style furniture.
There is no kitchen as such, or indoor bathroom.
The people who stay here will have to cook outdoors, and they have an outdoor loo!
There is no electricity, either. They look forward to staying here to get away from the city life, and enjoy weekends and vacations in the woods by the lake. Blueberry picking is fun!!
They definitely need a sauna, though . . .

And here, below, is the old-fashioned pull-out sofa which I have re-covered with Ira's fabric. I'm very pleased with it, but so far I don't quite know where to put it - I can feel another roombox appearing in my imagination . . .
I got it from Kim's Miniatures (here) here in New Zealand. I also got the sleigh bed, the table and the chair, which are in the lakehouse attic, from her.

Friday, August 6, 2010

Sofa and chair

This set is to go in the lakehouse. The kits are from Susan Karatjas at SDK Miniatures (here).
I cut down her two seater loveseat into a single chair. I left the wood unstained, just waxed, to look like pale birchwood.
The fabric (perfect - so Finnish!) is linen which Ira kindly sent me a while ago. I have enough of the blue left over to cover an old-fashioned Swedish pullout sofa - watch this space.

And talking of space - I don't have enough for all the things I have collected to put in there! :0 That's why I reduced the size of the smaller sofa.
They also say that 'less is more', so I guess I'm going to have to just change the interior every so often! Re-decorating is not a thing that I enjoy at all, but at dollhouse scale it must be easier . . .

Sunday, August 1, 2010

Lakehouse deck and floor

At last I've finished the deck for the lakehouse. I'm quite pleased with the weathered look to the boards - the grey and yellow seem to go well together.
The floor installed - it was a fight but I won :))
I ended up using Aleene's Tacky Glue (thanks for the suggestion, ladies) and weighting it down with heavy stuff (bags of cutlery is very effective!) on a thick oven tray, as well as clamping the front edge under a metal ruler. I kept pushing the back edge down with my fingers through the drying process, every ten minutes for an hour.
It has very slight ripples, but nothing that well-placed furniture and rugs can't cover ;)

Next time I use this veneer I'll do the flooring first, before building the kit. Then I'll be able to get at all the edges to flatten them properly. The attic in this house was particularly difficult to get the floor into the corners.

Now my little supervisors are asking 'where are the stairs?'.